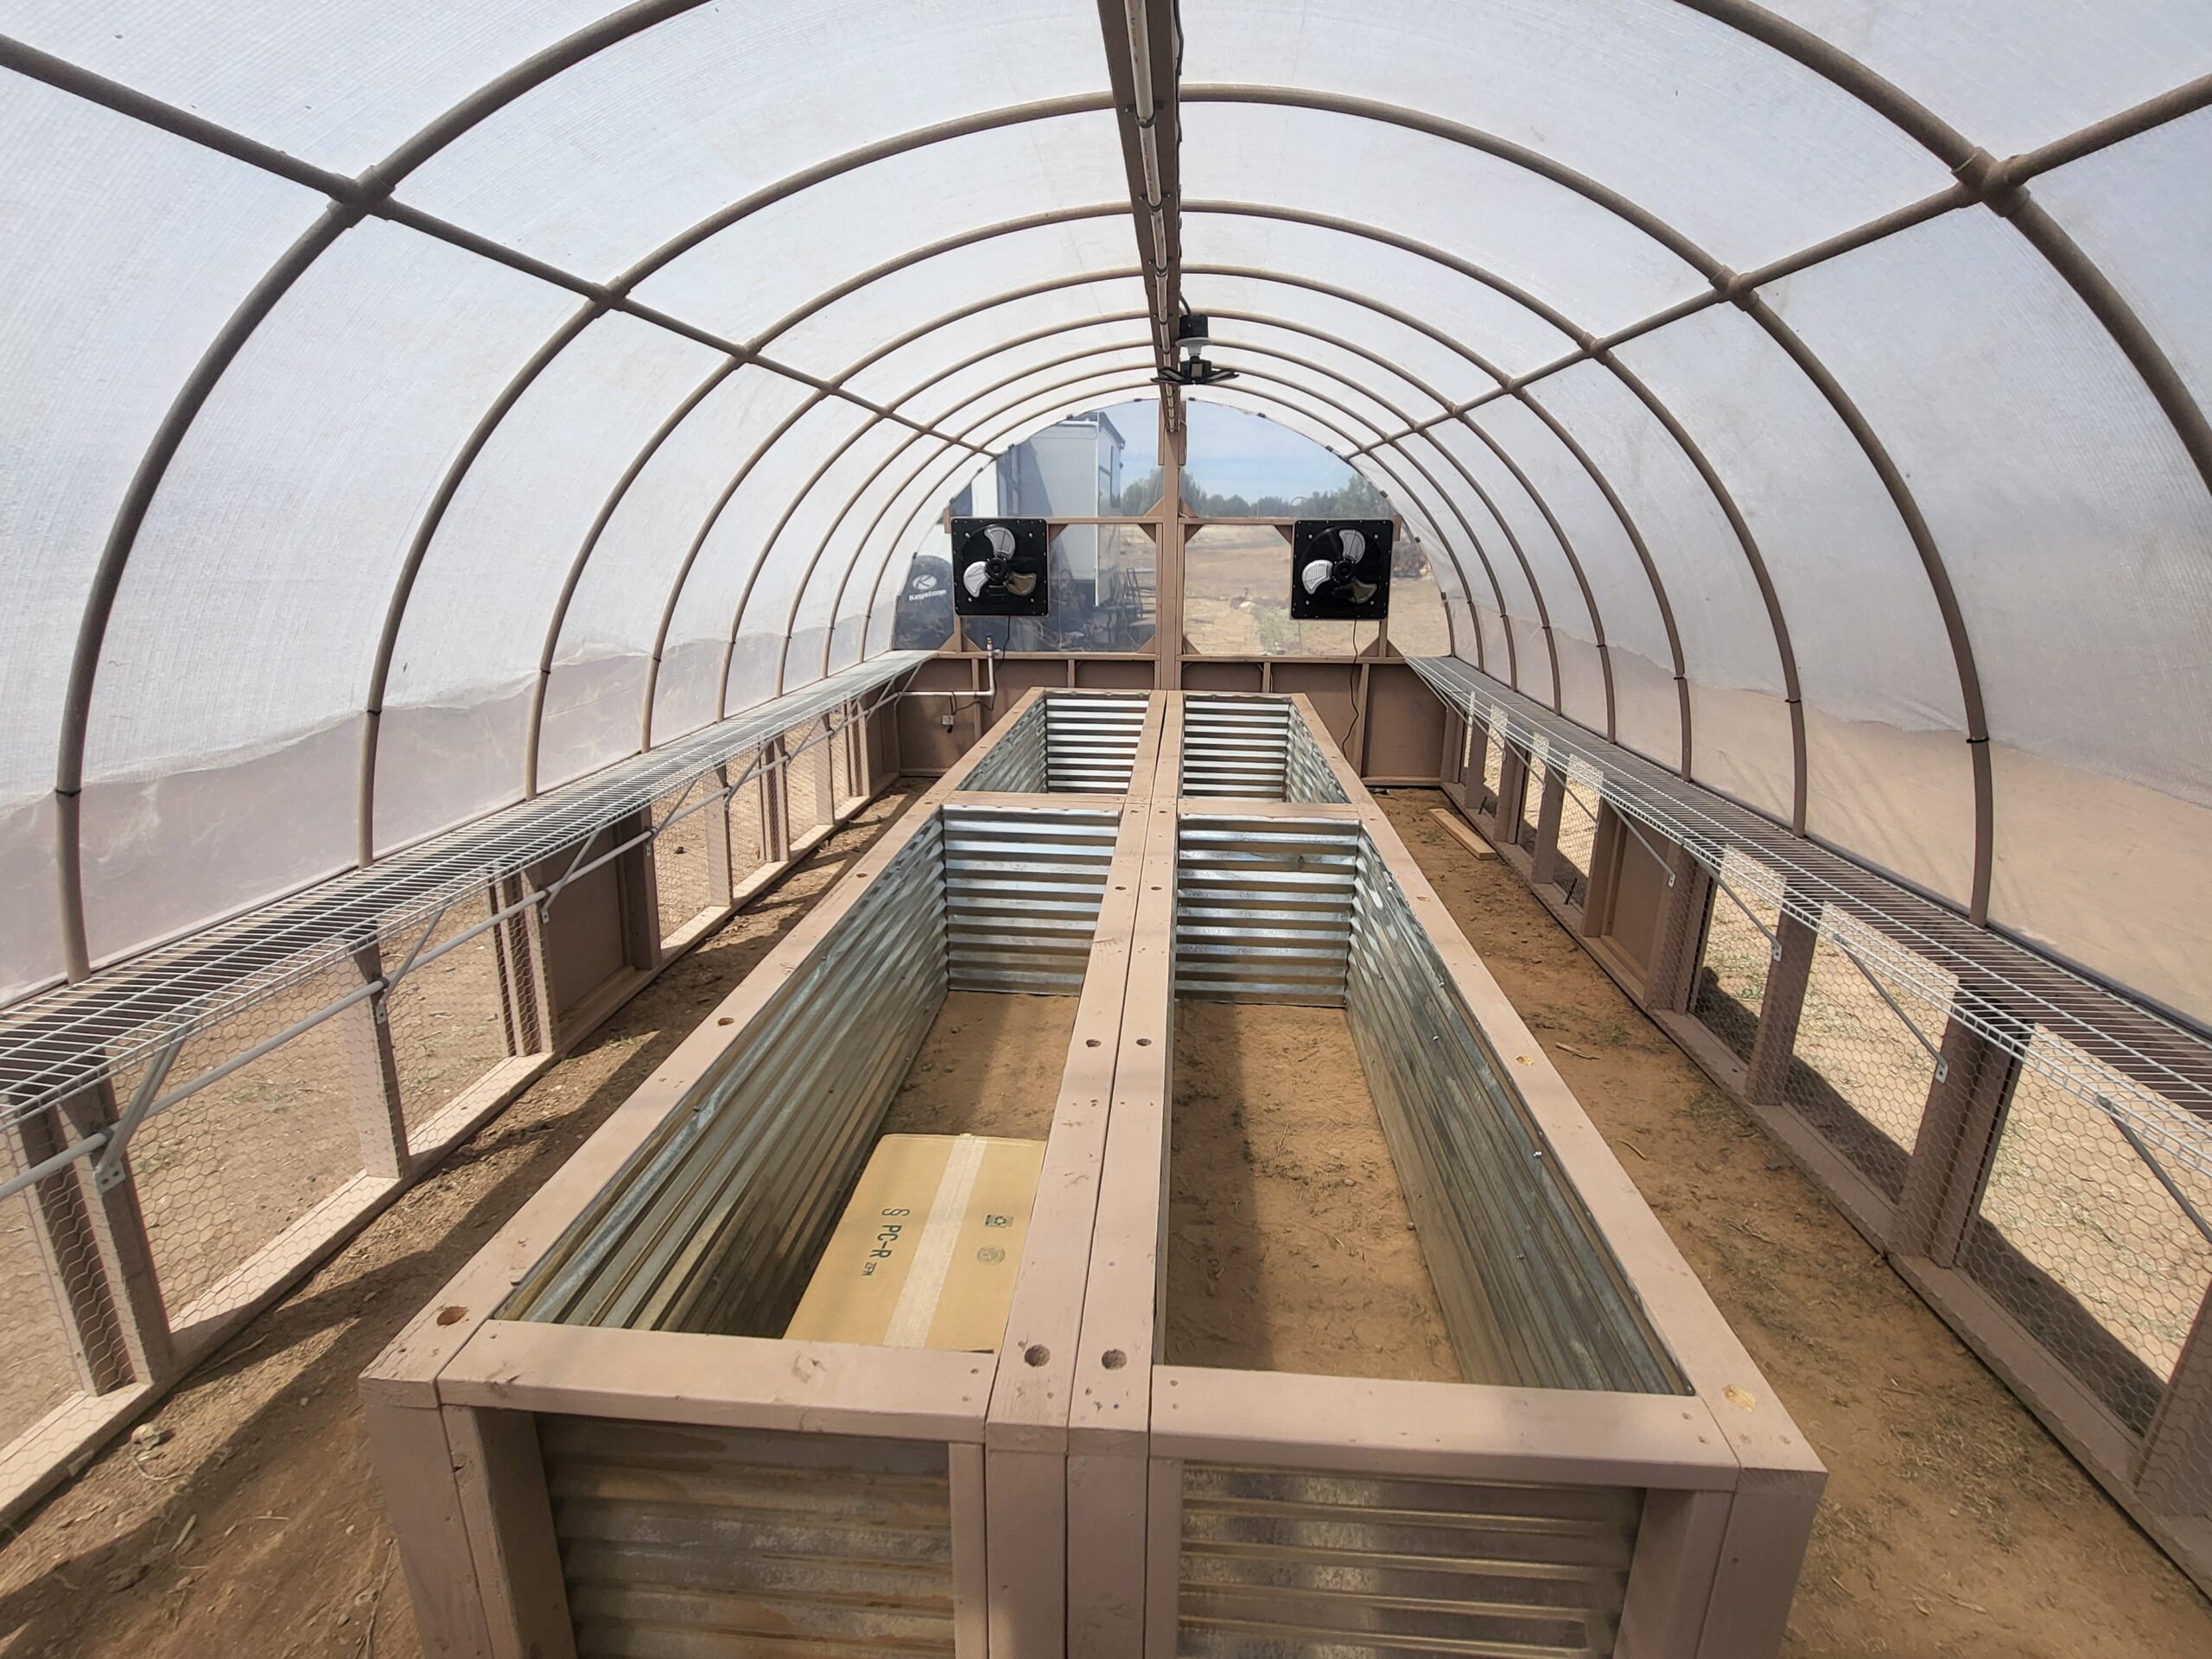
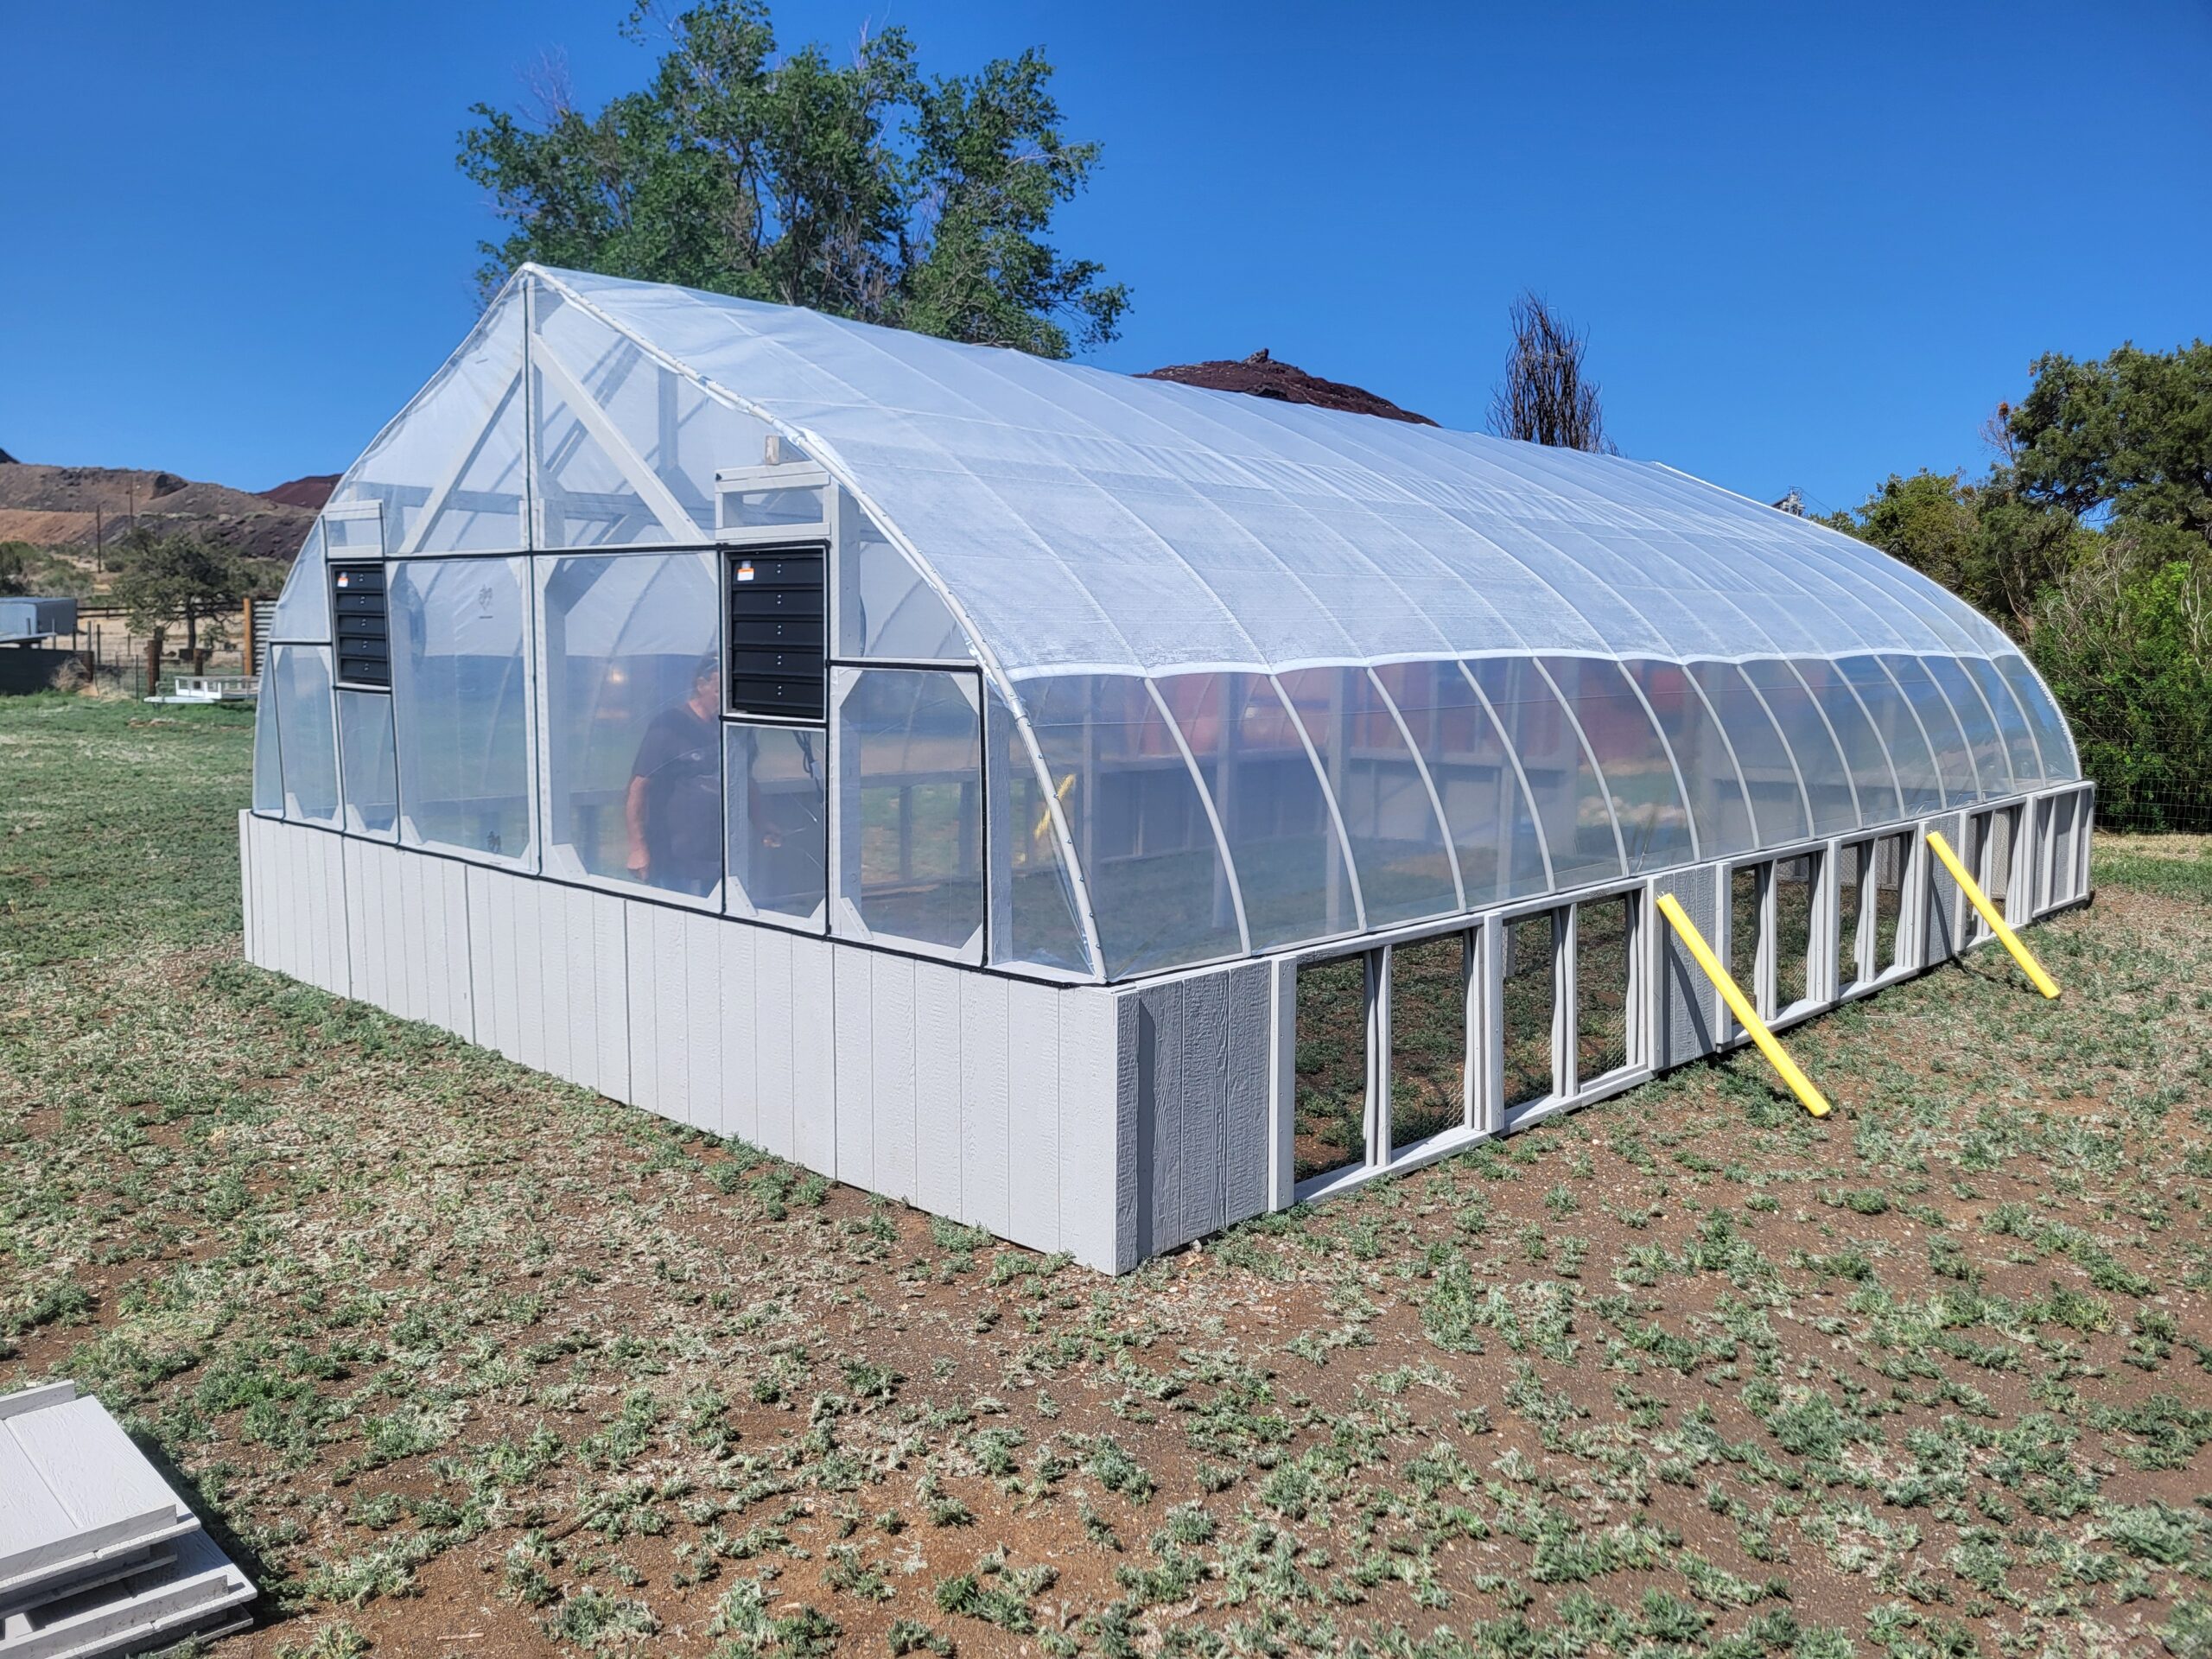
Anaheim Pepper

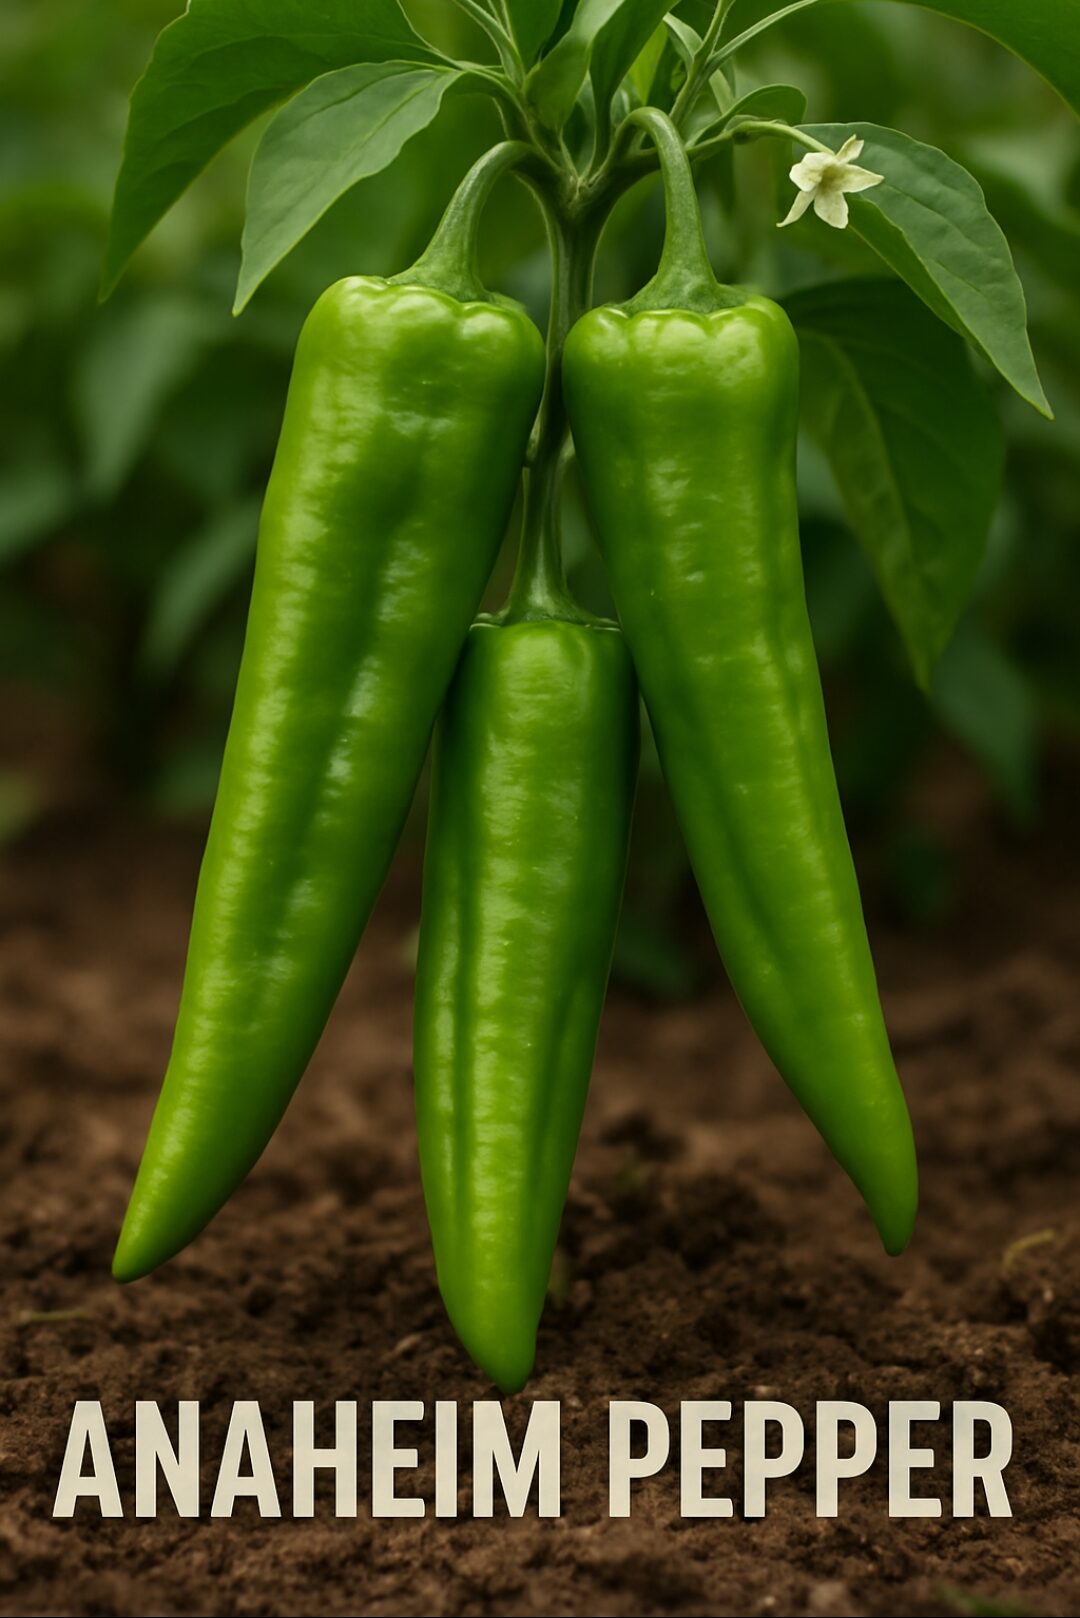
Planting Time Plant Anaheim peppers once the soil is warm and all threat of frost is gone. These mild mannered peppers love heat but are not nearly as dramatic as their spicy cousins. Start seeds indoors eight to ten weeks early and transplant outside once nighttime temperatures stay above fifty-five degrees. Warm days and steady sunshine makes Anaheim grow like a rodeo crowd at free taco night.

Depth & Spacing Transplant seedlings at the same depth they grew indoors and give each plant eighteen to twenty-four inches of space. Anaheims grow tall and lanky, like a cowboy who never quite grew into his boots. Proper spacing helps airflow and keeps plants strong during windy spells.

Soil & Fertilization Anaheim peppers thrive in rich, well drained soil enhanced with compost. Avoid heavy nitrogen fertilizer, or you will grow a jungle of leaves and hardly any peppers. A balanced fertilizer keeps plants productive and encourages long, smooth peppers perfect for roasting.

Watering Needs Keep the soil evenly moist but never soggy. Anaheims appreciate steady watering like a horse appreciates a clean trough. Letting the soil dry slightly between waterings helps deepen flavor without stressing the plant. Mulch helps keep moisture consistent and weeds pressure low.

Sunlight Requirements Give Anaheim peppers full sun for at least six to eight hours daily. These peppers love to work in the sunshine and reward you with sweet, better fruit the more light they receive. Shade will slow growth and rob flavor faster than watering down chili.

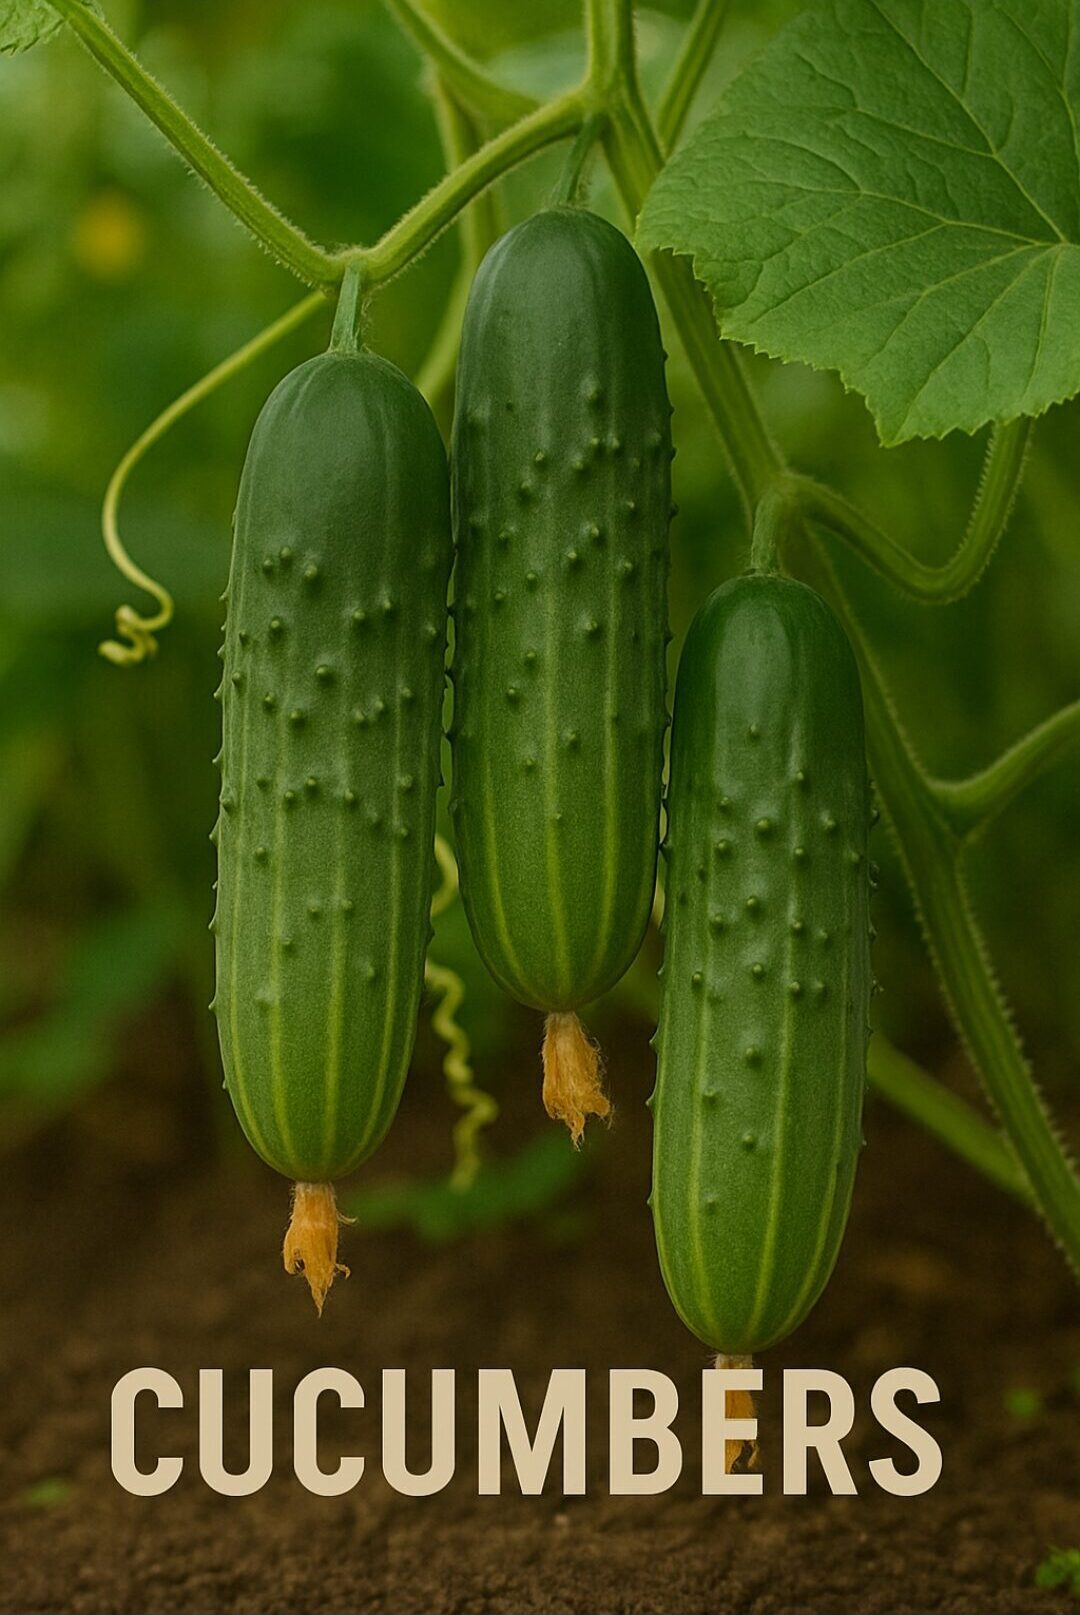
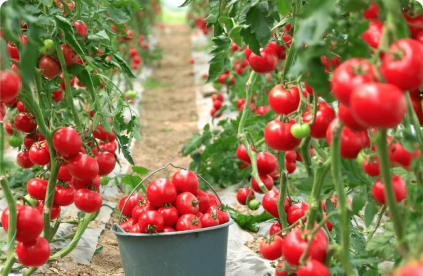
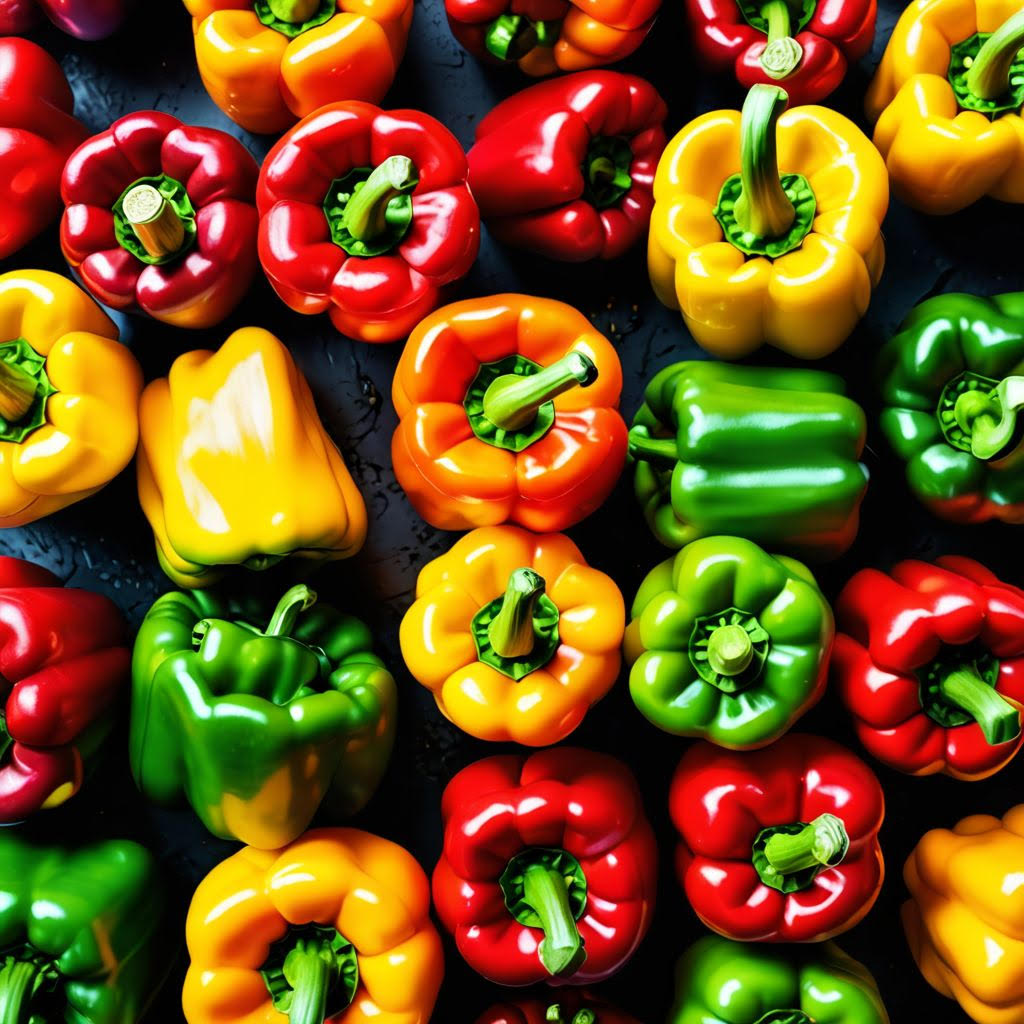
Harvesting Harvest Anaheim peppers when they reach six to ten inches long and are firm and glossy. Green peppers are mild and perfect for roasting. Letting them ripen to red increases sweetness and adds depth. Use snips to harvest to avoid breaking branches. Anaheim plants can be a little touchy when manhandled.

Captain Greenhouse Tip If you want Anaheims that will roast up like a dream, give the plants a little extra compost mid season, and keep them evenly watered. Stressed plants produce smaller fruit, but well fed and evenly watered plants reward you with long, smooth peppers perfect for stuffing, grilling, or turning into whatever cowboy concoction you are cooking. Plant a few extras because once folks taste them, they will be asking for more.

Artichoke

Artichoke

Planting Time Artichokes may look like the armored cousin of a medieval pineapple, but don’t let that tough exterior fool you. They’re big, buttery flowers that love warm, sunny weather. In cold climates, they can’t sit out a full year of yelping. In warmer climates, folks plant them in fall too, but up here in redneck country we try that once and learn real quick that planting them a little looks like. Plant early, plant growth, and plant like you’re chasing the king of the vegetable prom.

Depth & Spacing This one mostly needs plenty of elbow room. Artichokes grow big enough to hide a small dog or two, so space them about three feet apart. Set the crowns just deep enough to cover the roots—no need to bury them like Captain Ray’s old truck tires in a mud hole. Half inch to one inch deep, steady, snug, but still visible enough that Captain Ray doesn’t trip over it at the family cookout.

Soil & Fertilization Artichokes thrive in rich, loose, well-drained soil—the kind that feels like chocolate cake without the calories. Shoot for soil packed with compost, aged manure, or whatever your neighbor brags about using that magically makes his tomatoes bigger than yours too. Feed artichokes throughout the season; these plants are heavy cruisers and heavy eaters eat like teenage linebackers. Keep nutrients coming and they’ll reward you with buds that’ll make you strut.

Watering Needs Keep the soil moist but not swampy. You want hydrated artichokes, not ones training to be catfish. Water deeply one to two times a week depending on heat. During the blazing dog days, check the soil often—if it’s drier than a picnic table, call them. It’s watering time. Mulch helps too, like giving your plants a good hat so they don’t bake.

Sunlight Requirements Artichokes want full sun and lots of it. They’re basically solar-powered thistles. Give them at least six hours of sunlight, though more is better, like a key lime pie. They will tolerate some shade, but they walk off the bigger and tastier the buds grow, and nothing says “garden champion” like holding an artichoke the size of a softball.

Harvesting Harvest the year incoming, harvest artichokes when the buds are tight, firm, and about the size of your fist—unless your fists are enormous, in which case aim for average human fist size. Cut the bud along with a couple inches of stem. Many folks harvest a few, others cut the top of the plant at the ground. Cut the main stalk, but they won’t grow back to edible. Wait until the following year and they’ll look like a fat pine cone. Pick boldly and keep the plant producing like a slot machine on a lucky streak.

Captain Greenhouse Tip If you really want to impress the neighbors, grow a whole row of artichokes and tell everyone you’re raising “Mediterranean-style thistle flowers.” They grow tall, look expensive, and before you know it they think you’re actually a pro. And here’s a secret from one redneck to another: if you forget to harvest a few and they bloom, those big purple flowers will have folks thinking you hired a professional landscaper. Just smile, nod, and take the credit.

Asparagus

Asparagus

Planting Time Plant asparagus crowns in early spring as soon as the soil can be worked. This long-lived crop likes cool starts and steady weather. Once it gets settled, asparagus will produce year after year—like a dependable old ranch dog that never misses supper.

Depth & Spacing Plant crowns six inches deep in trenches spaced three feet apart. Set each crown eighteen inches away from the next. Give them room to stretch, because asparagus grows roots deeper than a redneck digging for buried beer money.

Soil & Fertilization Asparagus loves loose, rich, well-draining soil loaded with compost. Work in fertilizer before planting and top-dress each spring. This crop is in it for the long haul, so give it a buffet worthy of a country wedding.

Watering Needs Keep soil evenly moist during establishment. Once mature, asparagus handles dry spells, but steady watering yields fatter, sweeter spears. Neglect it and you’ll get skinny spears that look like they’ve been on a diet.

Sunlight Requirements Asparagus thrives in full sun. More sunlight means thicker, tastier spears—just don’t shade it out with tall crops unless you’re trying to grow asparagus that sulks.

Harvesting Do not harvest the first year. Take light harvests the second year, then go full cowboy in the third year. Cut spears when they reach six to eight inches tall. Once they start leafing out, let them grow to feed next year’s harvest.

Captain Greenhouse Tip To keep asparagus beds producing for decades, mulch heavy and keep weeds out. Treat this perennial patch like family—give it good food, good space, and don’t rush it—and it’ll reward you every spring with spears stout enough to make you puff your chest out like you just herded cattle before breakfast.

Basil

Planting Time Plant basil once the danger of frost has strutted out of town. This warm weather herb loves it hot, so much it would sunbathe on a tin roof if it could. When nighttime temperatures stay above fifty degrees, you are clear to sow. Basil jumps into action fast, rising out of the soil like it smelled spaghetti sauce cooking.

Depth & Spacing Plant seeds about one-quarter inch deep and give each plant ten to twelve inches of elbow room. Basil has being crowded more than a cowboy hates waiting in line at the saloon bar. Good spacing means better airflow, happier leaves, and pesto potential that will make your neighbors jealous.

Soil & Fertilization Basil thrives in well-drained soil that is rich but not overloaded with nitrogen. Too much nitrogen will grow leaves the size of dinner plates but dilute the flavor faster than watery down sweet tea. Keep it balanced and natural. A compost boost will make this herb sing like a fiddle at a barn dance.

Watering Needs Water consistently but do not drown the poor thing. Basil likes moisture, but soggy soil makes it wilt faster than a raccoon caught in the chicken coop spotlight. Water at the base, keep the leaves dry when possible, and mulch lightly to hold in moisture without starting a swamp.

Sunlight Requirements Basil needs full sun for flavor that will knock your boots off. Six to eight hours is the sweet spot. The more sunshine it gets, the more aromatic and flavorful the leaves become. Treat basil like a country singer-put it in the spotlight and let it perform.

Harvesting Harvest leaves once the plant is about six to eight inches tall. Pinch from the top to encourage bushy growth-basil loves a good haircut. Never let it flower if you want maximum flavor. Once basil blooms, it starts acting like it is retiring from the herb business and the flavor loses its punch.

Captain Greenhouse Tip If you want basil that tastes like it came straight out of a five star Italian kitchen, prune early and prune often. Basil rewards tough love. The more you pinch, the more it produces. Grow several plants and you will have enough to keep your pasta happy, your tomato salad singing, and your neighbors knocking on your door asking why it smells so good at your place.

Beets

Beets

Planting Time Plant beets in early spring or when fall cools things down. They love chilly soil and sprout fast, faster than a rumor spreading at the feed store. If you can poke a finger in the dirt without it snapping off from frost, you’re good to go.

Depth & Spacing Plant seeds about one-half inch deep and give each beet around three inches of elbow room. Rows about twelve inches apart keep them from bumping shoulders underground like Bubba at Thanksgiving.

Soil & Fertilization Loose, crumbly soil helps beets grow smooth instead of lumpy. Mix in compost or old manure to feed ’em. Avoid heavy clay unless you want beets shaped like confused potatoes.

Watering Needs Keep soil evenly moist, never swampy or bone-dry. Mulch helps hold moisture and keeps beets tasting sweet instead of bitter enough to pucker a mule.

Sunlight Requirements Full sun works best, but light shade won’t hurt ’em. Just make sure they get at least six hours of sunlight so they grow strong and colorful.

Harvesting Pick beets even when they reach about two inches across. Twist the greens off gently. Beet greens cook up like spinach and will make you feel fancier than a rooster in cowboy boots.

Captain Greenhouse Tip Beets stain everything: your hands, your shirt, maybe even your pride. But that deep red badge means you grew ’em right. If the neighbors ask why your hands look like you lost a thumb-wrestling match with a raspberry, tell ’em you’ve been officially promoted to Beet Wrangler by Captain Greenhouse.

Bell Peppers

Planting Time Bell peppers prefer warm soil and warm days, so plant them after frost has packed up and left town. Start seeds indoors eight to ten weeks ahead of time and transplant them outdoors once nighttime temperatures stay above fifty-five degrees. Bell peppers are like southern porch sitters; they want warmth, comfort, and zero surprises from the weather.

Depth & Spacing Transplant seedlings at the same depth as their starter pots and space them eighteen to twenty-four inches apart. Bell peppers need room to stretch and bulk up. Crowding them is like asking three linebackers to squeeze into a compact car. Give them breathing room and they will fill out with big, blocky peppers all season.

Soil & Fertilization Bells thrive in rich, well drained soil with plenty of organic matter. Go easy on nitrogen because too much will grow giant leaves and hardly any fruit. A balanced fertilizer or compost blend keeps peppers productive and flavorful. Healthy soil gives you thick walled, juicy peppers with a satisfying crunch.

Watering Needs Keep soil evenly moist but never soggy. Bell peppers do not like to dry out completely or sit in mud. Think steady watering with just enough time in between for the topsoil to dry slightly. Mulch helps hold moisture and keeps weeds from sneaking in like uninvited cousins at a family reunion.

Sunlight Requirements Bell peppers need full sun, soaking up at least six to eight hours daily. The more sunshine they get, the bigger and sweeter they become. Shade them and you will leave you with small fruits and slow growth, kind of like trying to barbecue with a flashlight instead of sunlight.

Harvesting Harvest bells when they reach full size and are firm and glossy. Green peppers are unripe but tasty. Letting them mature to red, yellow, or orange sweetens them up and boosts vitamin C. Snip peppers off with scissors to avoid breaking branches. Bell pepper plants can be drama queens if handled roughly.

Captain Greenhouse Tip If you want peppers that will make your county fair produce competition, give them a little afternoon shade during extreme heat. Peppers shut down when the thermometer jumps too high, just like a cowboy taking refuge under the nearest tree. Keep them cool, keep them watered, and they will reward you with sweet, crisp peppers all summer long.

Blackberries

Planting Time Blackberries are hardy, reliable, and eager to grow once the soil warms in early spring. Plant them as soon as the ground is workable. These berry monsters take off fast like a ranch mule and settle in quickly. Choose thornless varieties if you prefer fruit without the surprises of a prickly handshake.

Depth & Spacing Plant blackberry canes at the same depth they grew in the nursery pot. Space plants three to four feet apart in rows six to eight feet wide. They spread like a cowboy’s tall tales, so give them room to roam. Proper spacing improves airflow and keeps the patch manageable instead of a wild tangle.

Soil & Fertilization Blackberries thrive in well drained soil rich in organic matter. Add compost before planting for a strong start. Avoid heavy nitrogen fertilizers or you will grow vines big enough to rope cattle but very little fruit. Balanced feeding encourages sweet, juicy berries your neighbors will try to steal.

Watering Needs Consistent moisture is key, especially during flowering and fruiting. Water deeply once or twice weekly depending on weather. Dry spells make berries small and seedy, while overwatering invites root rot. Aim for steady moisture like a calm river-not a flood.

Sunlight Requirements Blackberries need full sun for the best yields. Six to eight hours of sunshine produces the biggest, sweetest berries. Shade grows berries that turn tart and stubborn, like a cowboy without his morning coffee. Sunlight sweetens them and boosts production.

Harvesting Pick berries when they turn deep black, plump, and slide off the stem easily. Ripe blackberries are tender, juicy, and sweeter than a love song at sunset. Harvest often-leaving ripe berries too long invites birds, bugs, and any nearby hungry human.

Captain Greenhouse Tip Train blackberry canes on a trellis or fence to make harvesting easier and improve airflow. Prune old canes after fruiting to encourage new growth for next season. Mulch heavily to conserve moisture and keep weeds from outsmarting you. With just a little attention, you will have berries so sweet your friends will swear you added sugar.

Blueberry

Planting Time Blueberries are patient little shrubs that appreciate planting in early spring or fall. They thrive when soil has cooled down and the world is calm. Blueberries take their sweet time settling in, but once comfortable, they produce fruit like it is their full time job. Choose two or more varieties for the best pollination and a bigger harvest.

Depth & Spacing Plant bushes at the same depth they grew in their nursery pots. Space them four to five feet apart, allowing room for their natural shape and spread. Blueberries grow like well mannered guests-they do not overgrow, but they do appreciate personal space. Proper spacing ensures good airflow and reduces disease.

Soil & Fertilization Blueberries demand acidic soil, ideally between $4.5$ and $5.5$ pH. Mix peat moss, pine bark, or soil acidifier to create the perfect environment. Avoid heavy fertilizers-too much nitrogen harms the roots and offsets these polite shrubs. Slow release, acid loving fertilizer works best, keeping plants happy and productive.

Watering Needs Blueberries have shallow roots and prefer consistent moisture. Water deeply once or twice weekly depending on heat. Dry spells make berries small and tart, while overwatering will rot the roots. Think gentle and steady-like giving a pony just enough oats to keep moving without running wild.

Sunlight Requirements Blueberries love full sun, producing their largest, juiciest berries with six to eight hours of daylight. They tolerate partial shade, but too little sun creates leafy shrubs with minimal fruit. Sunlight sweetens berries like sugar on cornbread-essential and delicious.

Harvesting Harvest when berries turn deep blue and release easily with a slight tug. Ripe blueberries have a dusty bloom on their skin and taste sweet with a hint of tartness. Birds adore ripe berries, so consider netting plants unless you enjoy watching feathered thieves steal your crop.

Captain Greenhouse Tip Blueberries thrive with mulch. Pine needles, bark, or wood chips all help maintain acidity, hold moisture, and keep weeds at bay. Prune lightly each winter to remove old wood and encourage fresh growth. With a little patience, your blueberry patch will become the pride of the neighborhood and the envy of every breakfast table.

Brussels Sprouts

Planting Time Brussels sprouts thrive in cool weather and act like a grumpy uncle who refuses to work when it gets hot. Plant in early spring or late summer so they mature as the weather turns chilly. If you plant these little green knucklebails in scorching heat, they’ll stall out like a tractor running on pancake syrup.

Depth & Spacing Plant seeds one-half inch deep and space plants about eighteen to twenty-four inches apart. Give ’em room or they’ll wrestle for elbow space like two cowboys fighting over the last fried pork chop at the potluck. Rows should be spaced about two to three feet apart so the wind can whistle through without knocking ’em over.

Soil & Fertilization Brussels sprouts love rich, well-drained soil—think of it like an all-you-can-eat buffet. Mix in compost and fertilizer before planting. They’re heavy feeders, so top-dress with nitrogen during the season. Don’t go overboard or you’ll grow leaves big enough to shade a pickup truck while the sprouts work on bragging.

Watering Needs Keep soil evenly moist. If the dirt dries out so much it cracks like a cowboy’s lips at a January rodeo, your sprouts will turn bitter. Try for deep, steady watering so the roots grow strong. These plants don’t like soggy feet, so don’t drown them like you’re baptizing them twice.

Sunlight Requirements Full sun is best—at least six hours a day. Too little light and your sprouts will grow slower than Uncle Billy leaving a tip. Give ’em a spot where they can soak up the sunshine, the plants stay sturdy, upright, and packed with tight little sprouts ready for the dinner plate.

Harvesting Sprouts mature from the bottom of the stalk upward. Harvest them when they’re about one inch across, roughly the size of that jawbreaker candy you haven’t seen since you were a kid. Twist each sprout off firmly. A light frost sweetens them, making them taste less like childhood punishment and more like something you seek on purpose.

Captain Greenhouse Tip If your Brussels sprouts start leaning like a cowboy after two cups of gas-station coffee, stake ’em up before they snap off or their budding cows down the pasture. For the sweetest sprouts, wait for a touch of frost—Mother Nature gives them a flavor boost that’ll make you strut around the garden like you just won the chili cook-off.

Broccoli

BROCCOLI

Planting Time Plant broccoli in early spring or late summer for fall harvests. This cool-season crop likes temperatures that won’t make a redneck sweat through his overalls. Start seeds indoors four to six weeks before your last frost or plant transplants once the soil is workable.

Depth & Spacing Plant seeds about one-quarter inch deep and space plants eighteen inches apart in rows two feet apart. Give each plant elbow room, because broccoli grows like it’s fixing to win the county fair.

Soil & Fertilization Broccoli loves rich, fertile soil loaded with organic matter. Mix in compost and a balanced fertilizer before planting. Keep feeding lightly through the season. Treat it like your prize hog—you don’t want it going hungry.

Watering Needs Broccoli appreciates steady moisture. Water deeply whenever the top inch of soil dries. Don’t sprinkle the leaves like you’re baptizing it—keep the water low and slow at the roots to avoid disease.

Sunlight Requirements Broccoli thrives with at least six hours of sunlight each day. Too much heat and this plant will bolt faster than a teenager avoiding chores.

Harvesting Harvest when the head is firm and tight, before the little buds start blooming. Cut the central head and the plant will often bless you with side shoots. It’s like finding bonus fries at the bottom of the bag.

Captain Greenhouse Tip If your broccoli starts acting dramatic in hot weather, give it afternoon shade with a row cover. Treat it gentle, and it’ll reward you with heads big enough to make you strut around the garden like you grew solid gold.

Bush Beans

Planting Time Plant bush beans after the frost has hit the road and warm soil has settled in. These little green wonders love sunshine, warm dirt, and a gardener with a git-er-done attitude. If the soil is still colder than a penguin’s bathwater, hold your horses. Beans like comfort, not cold shock. Once things warm up, those seeds jump up faster than a jackrabbit hearing a shotgun click.

Depth & Spacing Plant seeds one inch deep and about four inches apart. Rows should be spaced eighteen to twenty-four inches. Give them room to stretch. Bush beans do not like being packed tight like cattle in the Chisholm Trail, a historic. Crowded beans get grumpy, and grumpy beans do not produce worth a hoot.

Soil & Fertilization Bush beans enjoy good soil that drains well. They are easygoing, but if you dump too much nitrogen on them you will grow leaves big enough to shade a truck while producing about two beans total. Keep things balanced, steady, and respectable. Treat them right and they will reward you like a compound finding a full picnic basket.

Watering Needs Water regularly to keep moisture steady. Beans like consistency almost as much as Grandma likes her stories at the cracker-barrel. Do not drown them though. Soggy roots turn sour fast. Think of the soil like cornbread: dry enough to slice, moist enough to enjoy. Mulch helps keep things even and knocks weeds down like a bar bouncer on a Saturday night.

Sunlight Requirements Give bush beans full sun, at least six hours, and more is even better. These plants are like country singers, they perform best under bright lights. The more sunshine they soak up, the more beans you will haul in, and pretty soon you will be bragging to the neighbors like you just won the county fair.

Harvesting Pick beans when they are firm, crisp, and about pencil thick. Do not let them stay on the plant too long or they will get tougher than Grandpa’s boots and slow down production. Harvest early and often. Bush beans love attention. Cut the more you pick, the more they strut their stuff. Skip a harvest and they puff up like a tick on a hound, telling the plant it is time to quit working.

Captain Greenhouse Tip For bean production that will make you feel like a full blown farming legend, stagger your plantings every two weeks. That way you will have beans rolling in all summer long, enough to feed your household, your neighbors, your preacher, and any cousin who only shows up when food is involved. Keep the cycle going and you will be the undisputed Bush Bean Boss of the county.

Butternut Squash

Planting Time Butternut squash loves warm soil and long sunny days. Plant seeds outdoors once all danger of frost is gone and the ground feels warm to the touch. These vines are slow starting but strong finishers, growing like they are in a race to take over the whole county. Starting seeds indoors two to three weeks early gives them an extra boost.

Depth & Spacing Plant seeds one inch deep and space hills three to four feet apart, or twenty four to thirty six inches if planting in rows. Butternut vines sprawl like a cowboy stretching out after dinner, so give them room to roam. Tight spacing leads to tangled vines and squash competing like siblings fighting over the last biscuit.

Soil & Fertilization Squash thrives in rich, well drained soil loaded with compost. These plants are heavy feeders, so mix in plenty of organic matter before planting. Too much nitrogen grows beautiful vines but very little fruit. Balanced feeding gives you plump, sweet squash that roasts up like candy.

Watering Needs Keep soil consistently moist, especially during flowering and fruit set. Deep watering builds strong roots and juicy fruit. Avoid splashing water on the leaves to reduce disease. Think long, slow drinks-like a ranch hand relaxing with a cold sweet tea after a hot day.

Sunlight Requirements Butternut squash needs full sun, soaking in six to eight hours daily. Sunshine powers the vines, strengthens the fruit, and improves flavor. Shade slows production and leaves you with squash that tastes more like disappointment than homegrown goodness.

Harvesting Harvest when the skin turns a deep tan color and the stem becomes dry and corky. A fully ripened butternut squash is tougher than a bull rider’s vest. Cut the fruit from the vine with a few inches of stem attached for best storage. Cured squash lasts for months, giving you a taste of summer even in the dead of winter.

Captain Greenhouse Tip For bigger, sweeter squash, pinch off new flowers late in the season to focus energy on the fruit already forming. Mulch heavily to keep weeds down and moisture steady. And plant more than one plant-squash vines spread like cowpokes, so guide them where you want them or they will explore the whole backyard.

Cabbage

Cabbage

Planting Time Cabbage thrives in cool weather and throws a hissy fit when summer heat rolls in. Plant in early spring or late summer so your heads mature before temperatures soar. Hot weather makes cabbage bolt faster than a coon dog chasing a raccoon through the holler.

Depth & Spacing Plant seeds one-half inch deep and space plants about eighteen inches apart. Rows should be spaced two to three feet wide, giving each plant enough room to swell up into a fine-looking head. Crowded cabbage acts like siblings sharing a bathroom—nothing but fussing and no one reaches their full potential.

Soil & Fertilization Rich, well-drained soil is the secret to big, hearty heads. Mix in plenty of compost or aged manure, and top-dress with nitrogen as it grows. Cabbage is a heavy feeder that’s built for crunching and is built to be a casserole—nobody wants to eat bitter cabbage. Feed heavily and often for crunchy-perfect for slaw, stew, or that one aunt’s mysterious casserole nobody admits to eating.

Watering Needs Cabbage loves moisture but not soggy roots. Keep the soil evenly moist so the heads form tight and solid. If the soil gets too dry, the leaves will droop like a cowboy after a long ride in August. But don’t drown them either—cabbage doesn’t appreciate being treated like it’s learning to swim.

Sunlight Requirements Cabbage can handle the energy it needs to bulk up. Some afternoon shade is fine, especially in hot regions. But plant them in deep shade and they’ll stretch out thin and floppy like someone reaching for a biscuit at the far end of the table.

Harvesting Harvest when the heads feel firm—imagine a bowling ball made of lettuce. Cut the head at the base with a sharp knife. Leaving the lower leaves and stump may reward you with bonus little “cabbage sprouts” to eat stir-fry or showing off to neighbors who think cabbage only comes from the grocery store.

Captain Greenhouse Tip If your cabbage heads start splitting open like jeans after Thanksgiving dinner, they’re getting more water than they can handle. Ease up on watering or harvest a little early. And keep an eye out for cabbage worms—those freeloaders will leave more holes than a goat loves chewing on the porch steps. A little vigilance now keeps your slaw critter-free later.

Cantaloupe

Planting Time Cantaloupe loves warm soil and lots of sunshine. Plant after all danger of frost has skedaddled, and soil temperatures reach at least sixty five degrees. These vines take their sweet time waking up but once they get going, they grow like a cowboy eating a large slice of pie. Starting seeds indoors two to three weeks early helps jump start the season.

Depth & Spacing Sow seeds one inch deep in hills spaced three to four feet apart, or plant in rows with two feet between plants. Cantaloupe vines wander like a curious cowpoke, so give them plenty of room. Crowding leads to tangled vines and small melons-kind of like trying to grow watermelons in a teacup.

Soil & Fertilization These melons thrive in rich, well drained soil boosted with compost. Avoid excessive nitrogen or you will grow lavish, green vines and barely any fruit worth bragging about. Balanced feeding creates sweet, fragrant melons that taste like summer sunshine mixed with a little bit of heaven.

Watering Needs Cantaloupe needs steady moisture early on, especially while vines and fruit are forming. Reduce watering once melons begin to ripen, or the fruit may turn bland. Letting the soil dry slightly between waterings boosts sweetness. Think of it like raising kids-give them a little tough love and they turn out sweeter.

Sunlight Requirements Cantaloupe demands full sun, soaking up six to eight hours each day. Sunshine powers the vines and builds that incomparable sweet flavor. Shade produces weak melons that taste like disappointment. Give them all the sun they want and they will reward you generously.

Harvesting Harvest cantaloupe when the skin turns tan and netted, and the fruit slips off the vine with gentle pressure. A ripe cantaloupe smells sweet at the blossom end, like a natural perfume. Only melons can make. Pick at peak ripeness and enjoy within a day or two for maximum flavor.

Captain Greenhouse Tip Place straw or boards under developing melons to keep them clean and dry. Prune secondary vines to direct energy into fruit production. And remember-cantaloupe is a showoff. The more sun and space you give it, the sweeter it becomes. Grow a few and you will be the undisputed melon master of the neighborhood.

Celery

Celery

Planting Time Plant celery in early spring once the soil can be worked, or start seeds indoors ten weeks before your last frost. Celery is pickier than a hungry hound in a steakhouse and likes cool, steady weather. If heat rolls in too early, this plant will bolt like it heard banjos.

Depth & Spacing Sow seeds one-eighth inch deep because celery seeds are tiny. Space plants eight to ten inches apart in rows one foot apart. These leafy stalks need elbow room like a cowboy at a buffet.

Soil & Fertilization Celery thrives in rich, moisture-holding soil loaded with compost. Mix in a balanced fertilizer before planting and feed lightly every couple of weeks. Treat celery right and it’ll grow crisp and proud for every soup and stew you dream up.

Watering Needs Celery is thirstier than a ranch hand after branding day. Water deeply and consistently to keep the soil evenly moist. If celery dries out, it turns bitter—nobody wants angry celery.

Sunlight Requirements Celery prefers full sun but tolerates afternoon shade. Too much heat will stress the plant faster than a bull rider on a greased saddle.

Harvesting Harvest celery when stalks are tall, crisp, and thick. Cut the entire plant at the base or take individual stalks as needed. Fresh celery snaps louder than a cowboy cracking jokes at a campfire.

Captain Greenhouse Tip If your celery starts sulking in the heat, lay down a mulch blanket around the base. It keeps the soil cool and moist, which keeps celery happy. Happy celery means crisp stalks that’ll make you strut around the garden like you just roped a runaway steer.

Chard

CHARD

PLANTING TIME Chard, also known as Swiss chard, rainbow chard, or “that fancy leaf your neighbor brags about,” is one of the easiest greens to grow. Plant it in early spring as soon as the soil is workable, or in fall if you’re feeling bold. Chard loves cool weather but can ride out heat like a cowboy on a stubborn mule. Plant early and plant often—this leafy rascal doesn’t know how to quit.

DEPTH & SPACING Sow seeds about one-half inch deep and space plants roughly one foot apart. These plants puff up like a weightlifter on protein powder, so don’t cram them. Give each plant enough room to strut around without bumping elbows. Rows about one and one-half feet apart work great unless you’re growing them in containers, which chard tolerates like a champ.

SOIL & FERTILIZATION Chard thrives in rich, well-drained soil full of organic matter. If your soil feels like a brick or smells like your cousin’s gym socks, fix it with compost. Feed chard lightly every couple weeks and it’ll pump out leaves like a salad factory. This stuff is tougher than a bargain-bin steak and keeps producing long after other greens have waved the white flag.

WATERING NEEDS Keep the soil consistently moist but not soggy. Chard appreciates a steady drink—think of it like a polite guest who doesn’t complain but sure notices if you forget the sweet tea. Water one to two times a week, more if the summer sun starts cooking your garden like a cast-iron skillet. Mulch helps hold moisture and keeps the roots cool.

SUNLIGHT REQUIREMENTS Chard grows well in full sun but doesn’t mind part shade—it’s about as flexible as a yoga instructor on Sunday morning. Six hours of sunlight is ideal, though it’ll tolerate less if the weather’s hot. In blazing climates, a little afternoon shade keeps the leaves from wilting like a tired farmhand.

HARVESTING Begin harvesting when the outer leaves reach about eight to twelve inches long. Grab the leaf at the base and snap it clean or cut it with a knife if you’re feeling fancy. Avoid tugging too hard unless you want to uproot the whole plant like a rookie. Keep picking regularly and chard will keep throwing out new leaves faster than gossip spreads at a church potluck.

CAPTAIN GREENHOUSE TIP If you want a vegetable that makes you look like a gardening genius with almost no effort, chard is your new best friend. It grows huge, looks like a neon rainbow, and tastes good whether you sauté it, steam it, or sneak it into recipes so the kids don’t know they’re eating something healthy. And here’s a pro tip from one country boy to another: if the plants start looking ragged, just give them a haircut. They’ll bounce back fresher than a rooster at sunrise.

Cilantro

Cilantro

Planting Time Cilantro is finicky and likes the air cool but the soil warm. Plant it in early spring or fall. Once the weather gets hotter than a match head, it will bolt to seed and turn bitter. Plant a new batch every few weeks to keep the fresh leaves coming.

Depth & Spacing Sow seeds one-half inch deep and space them six to eight inches apart. Give the plants room for good airflow to keep them from getting too humid.

Soil & Fertilization Cilantro likes loose, well-drained soil. Mix in plenty of compost. It is not a heavy feeder, so avoid too much nitrogen.

Watering Needs Water consistently to keep the soil moist but not soggy. Watering is key to keeping the plant from bolting.

Sunlight Requirements Cilantro prefers full sun in cool weather. In warm climates, plant it where it will get morning sun and afternoon shade.

Harvesting Harvest the outer leaves when the plant is about six inches tall. Do not cut more than a third of the plant at a time. If it starts to produce a flower stalk, cut it off to encourage more leaf growth. If you let it flower, you can harvest the seeds (coriander).

Troubleshooting The main problem is bolting when the weather gets hot. Use shade cloth or plant under taller crops to keep it cool. Watch for aphids.

Captain Greenhouse Tip Cilantro grows great in a greenhouse if you keep it cool. Put it next to the vents or use a fan for strong airflow. Plant small batches continually for a steady supply.

Cauliflower

Cauliflower

Planting Time Cauliflower loves cool weather, so plant in early spring or fall when temps stay steady. Think of cauliflower as that relative who won’t visit unless the weather is “just right.” Too hot and it throws a fit, too cold and it sulks. Aim for mild, gentle temperatures so your plants don’t start acting like moody teenagers.

Depth & Spacing Set transplants at the same depth they were growing in the nursery pot. Space them 18 inches apart so they can get plenty of breathing room, and stretch the Rows shorter, like 24 inches apart—just enough space for you to walk through feeling like the sheriff of Garden Town. Treat me cauliflower respects a gardener who walks tall.

Soil & Fertilization Cauliflower is a heavy feeder, hungrier than a redneck at a catfish fry. Mix in compost, aged manure, and a balanced fertilizer before planting. Keep nutrients coming throughout the season so this plant can grow big and curved, a giant growing like you. Be standing there wondering why your cauliflower is the size of a golf ball instead of a Sunday roast centerpiece.

Watering Needs Keep soil evenly moist—consistent like morning coffee or your favorite old pickup that always starts. If cauliflower dries out, the plant may button-hook, so just keep her up. A drip line works wonders, and mulching helps hold moisture so you’re not out there babysitting your plants like a helicopter parent.

Sunlight Requirements Give cauliflower full sun, at least 6 hours daily. More sun means tighter, prettier heads. Without enough light, your plants grow tall, spindly, and confused—like they’re wandering in the nearest exit. Plant them where they can soak up the rays and flex their leafy muscles.

Harvesting Harvest when the heads are firm, tight, and snow-white. If they start to separate or discolor, you’ve waited too long. Cut the head with a few wrapper leaves left to protect it. Nothing says “I’m a garden legend” like showing off a cauliflower the size of a bowling ball—bonus points if you carry it inside like a newborn baby.

Captain Greenhouse Tip Cauliflower can sunburn faster than a tourist in Phoenix wearing SPF-0. If your curds start to yellow, gently pull the outer leaves over the head and tie them loosely. This little trick—called blanching—keeps the head crisp, clean, and whiter than Uncle Bubba’s church socks. Your cauliflower will stay tender and fancy looking, and you’ll look like the kind of gardener who actually knows what they’re doing. That is a win, partner!

Cucumber

Planting Time
Cucumbers love the heat more than a hound dog loves a ham bone. Wait until all danger of frost has passed and that soil warms up good before planting. If you jump the gun, you’ll end up with more sad little sprouts than pickles in a jar. Plant them in late spring or early summer when the ground feels warm to the touch -that’s cucumber country right there.

Depth & Spacing
Plant cucumber seeds about one inch deep and around one foot apart if you’re doing rows. If you’re going vertical with trellises, you can squeeze ’em in a bit tighter. Leave about three feet between rows so you’ve got room to walk without squashing the vines like last year’s pumpkin pie.

Soil & Fertilization
Cucumbers like rich, well-drained soil that’s full of organic matter. Mix in compost or aged manure before planting, because these fellas are hungry growers. A balanced fertilizer with nitrogen, phosphorus, and potassium will get those vines stretching faster than a coonhound chasing a rabbit.

Watering Needs
Cukes are thirstier than a cowboy in July. Give them about one inch of water a week – steady and even. Don’t flood ’em though, or they’ll sulk like a teenager at a family reunion. Drip irrigation works best to keep those leaves dry and healthy.

Sunlight Requirements

Full sun, no exceptions! Cucumbers need at least six to eight hours of good sunlight every day. The more sun they get, the happier they’ll be – and the more likely you’ll be bragging at the next backyard barbecue about your bumper crop of crisp, cool cucumbers.

Harvesting
Pick your cucumbers while they’re still young and tender – about six to eight inches long for slicers,or two to four inches if you’re doing pickling varieties. Don’t let them grow too big or they’ll turn as bitter as a jealous ex. Keep picking often, and the plants will keep producing.

Pests & Problems
Watch out for cucumber beetles and powdery mildew – those pests are like uninvited guests at a picnic. Use row covers early on and keep air flowing between plants to prevent fungus. Rotate your crops each season, and those bugs will have to hunt elsewhere for supper.

Captain Greenhouse Tip
If you’re growing cucumbers inside your Heavenly Hoop House, let those vines climb! Use a sturdy trellis or netting so the fruit hangs straight and clean. You’ll save space, keep the cukes off the dirt, and make harvest time easier than swiping the last biscuit at Sunday dinner.

Carrots

Carrots

Planting Time Carrots thrive in cool weather or late summer when the air turns cool enough to make a redneck think twice about wearing shorts. Planting in cooler temperatures helps those roots grow sweet and straight—well straighter than Cousin Earl’s last fishing tale. Carrots can sprout off right but faster than a cowboy shrugs off running out of coffee, so plant with confidence and a grin.

Depth & Spacing Sow seeds one-half inch deep so they feel snug without needing a rescue crew. Space rows about 12 inches apart so each carrot has room to stretch out like it’s sunbathing by the creek. Seedlings crowd each other, you’ll end up with carrots shaped like they’re line for square dancing—thin ’em early and keep the peace underground.

Soil & Fertilization Carrots crave loose, rock-free soil. If the dirt is packed tighter than rivets on a Saturday night speech coach, you’ll end up with roots that look like old dog’s tails. Mix in compost and fertilizer before planting and feed lightly every couple of weeks. Treat carrots like a rancher eats pie. Mix in compost and fertilizer before planting, and give leafy tops big enough so shade your truck while the roots stay small and grumpy.

Watering Needs Carrots prefer steady, even moisture—think gentle sips, not a firehose. Dry soil causes roots to crack faster than a possum darting across the road. Mulch helps keep moisture even and saves you from watering so often, leaving more time for porch sittin’ lemonade drinkin’, and wonderin’ why rabbits always act like they own the place.

Sunlight Requirements Carrots enjoy full sun and will power up nicely with six to eight hours of bright light. They’re pretty even-tempered, like your favorite old dog who doesn’t bark at the trash. Give ’em sunshine and they’ll grow crisp, sweet roots that’ll make you question paying store prices ever again.

Harvesting Most carrots mature in 60-80 days. When their orange shoulders peek above the soil like nosey neighbors, it’s tugging time. Loosen the soil first unless you want an arm workout that’ll introduce you to back pain, cuss words. Check a sample carrot—if it resists, it’s saying, “Not yet, partner,” so give it a little more time.

Captain Greenhouse Tip Crocked carrots ain’t a failure—they’re a sign your soil had more bumps than a dirt road after spring rains. They still taste amazing and add personality to your harvest. And remember: growing your own food turns you into the kind of hero rabbits write legends about.

Dill

Planting Time Dill grows best when planted in early spring or late summer. It prefers cool weather and bright light. High heat can make it flower too soon, so planting before the hottest months helps it stay leafy and productive. Dill is simple and dependable, bringing fresh aroma and charm to any garden.

Depth & Spacing Sow seeds one quarter inch deep and thin seedlings to stand twelve to fifteen inches apart. Dill grows tall and airy, so giving each plant space keeps them upright and strong. Proper spacing prevents the common problem of plants falling over when the wind blows.

Soil & Fertilization Dill prefers loose, well drained soil with a modest amount of compost. It does not need heavy feeding. Too much nitrogen makes the plant tall and weak. A light compost mix at planting time keeps dill flavorful and sturdy without causing it to grow too fast.

Watering Needs Water dill regularly to maintain lightly moist soil, especially during early growth. Once mature, it tolerates short dry spells but grows best with steady moisture. Overwatering creates soft, unhappy roots. Aim for balanced moisture that keeps the soil comfortable but never soaking.

Sunlight Requirements Dill grows best in full sun, which produces strong stems and bold flavor. It tolerates partial shade, but too much reduces flavor, making stalks thin and weak. Good sunlight helps dill reach its full potential for both cooking and pickling.

Harvesting Harvest leaves when the plants reach eight to twelve inches tall. Snip fronds early in the day for the strongest flavor. To harvest seeds, wait until the flower heads turn brown and the seeds begin to dry. Dill seeds add great flavor to pickles, breads, and soups and store well for long periods.

Captain Greenhouse Tip Dill reseeds itself naturally, so once you plant it, expect it to return year after year. For a steady supply, stagger new plantings every two to three weeks. If you want fuller plants, pinch off early flower buds. With a little care, you will always have plenty of fresh dill for cooking, canning, and sharing.

Garlic

Garlic

Planting Time Garlic gets planted in the fall, right when everything else in the garden is packing up for the winter. Plant about six weeks before the ground freezes so the cloves can settle in. Fall planting gives garlic a jump start, and come springtime, it shoots up ready to conquer the world.

Depth & Spacing Plant each clove two inches deep with the pointy end up. Space cloves about six inches apart.

Soil & Fertilization Garlic prefers loose, rich soil with plenty of compost mixed in. Heavy soil makes the bulbs grow lopsided. Feed garlic a nitrogen boost in early spring, then ease up as the bulbs begin forming.

Watering Needs Water regularly through spring and early summer. Stop watering about two weeks before harvest to help the outer skins dry down properly.

Sunlight Requirements Garlic loves full sun. Six to eight hours a day. Shade makes it grow slow and puny.

Harvesting Harvest garlic when the lower leaves turn brown but the top leaves are still green. Pull the bulbs gently and lay them out to cure for two to three weeks in a warm, airy spot. Once the skins tighten up, clip the top and roots. Store them garlic in a cool, dry place.

Growing Tips Mulch well after planting to insulate the cloves over winter and keep weeds from invading. Rotate garlic beds yearly to prevent soil diseases. Remove the scape (the curly flower stalk) in early summer.

Captain Greenhouse Tip Grow plenty of garlic and you’ll feel like a wizard with magic cloves. Homegrown garlic is stronger, sweeter, and tastier than store-bought bulbs.

Green Oinions

Green Onions

Planting Time Green Onions are cooler than a creek in late fall. Plant them in early spring or fall. They’re tougher than old boots and handle a light frost just fine.

Depth & Spacing Sow seeds one-half inch deep, or if planting sets, plant them one inch deep. Space seeds closely, about one inch apart. You can thin later for larger, thicker Green Onions.

Soil & Fertilization Green Onions want rich, loose, well-draining soil with plenty of compost. They need nitrogen to grow big, green tops. Add a light dose of balanced fertilizer every month to keep them happy.

Watering Needs Keep the soil evenly moist like a wet sponge, but not waterlogged. Give them about one inch of water a week. Consistent watering keeps them tender.

Sunlight Requirements Full sun is best, but they can handle a little partial shade. Six to eight hours of direct sun will give you the best crop.

Harvesting Harvest when they reach pencil thickness or whenever you need them. You can pull the entire plant, or cut the tops and leave the white bulb to grow a new top for a continuous harvest.

Troubleshooting Watch out for onion maggots and thrips. Rotate planting spots every year to keep the soil clean.

Captain Greenhouse Tip Green Onions grow fast and can be planted in flats or small containers. You can grow a quick crop of green tops even in a small corner of your greenhouse.

Honeydew Melon

Planting Time Honeydew melons are warm weather lovers and will not lift a finger until frost is long gone and soil temperatures reach at least sixty five degrees. Plant them in late spring when the ground feels warm enough to nap on. Starting seeds indoors two to three weeks early gives these melons a head start, but they prefer to finish the race outdoors in full sunshine.

Depth & Spacing Sow seeds one inch deep in hills spaced three to four feet apart. If planting in rows, give each plant two feet of elbow room. Honeydew vines wander like curious cowboys exploring new territory, so make sure they have plenty of real estate. Crowding them results in puny melons and tangled vines.

Soil & Fertilization Honeydews thrive in rich, well drained soil boosted with compost. Avoid nitrogen heavy feeding or you will grow vines that look like jungle vines but get very little fruit. Balanced feeding helps melons swell into big, sweet globes bursting with flavor. Healthy soil equals heavenly honeydew.

Watering Needs Water consistently early in the season to help vines and fruits develop, then back off the watering once melons begin ripening. Too much water late in the game dilutes sweetness. Think of it like tough love-give them a steady start, then let them finish strong. Mulch helps hold moisture and keeps weeds polite.

Sunlight Requirements Honeydews require full sun-six to eight hours minimum. Sunshine builds flavor, aroma, and sweetness. Shade builds flavorless melons that taste like watered down lemonade. Give them sunshine and they will give you fruit worth bragging about.

Harvesting Harvest when the rind turns creamy yellow and the blossom end feels slightly soft. A ripe honeydew smells sweet and floral, almost like it is wearing perfume. Unlike cantaloupe, honeydews do not slip from the vine-cut them free when they look and smell just right. Enjoy promptly for maximum juicy sweetness.

Captain Greenhouse Tip For sweeter melons, reduce watering during the last ten to fourteen days before harvest. This concentrates sugars and boosts flavor. Place straw or boards under growing melons to keep them clean and dry. And remember-melons love heat. So give them a sunny patch and watch them shine.

Habanero Pepper

Planting Time Plant habanero peppers after the frost has hit the road and warm soil has long gone packing. These fiery little peppers love heat so much they would vacation in Arizona if they could. Start seeds indoors eight to ten weeks before planting, and transplant once nighttime temps stay above fifty-five degrees. Think of them as sun worshippers with an attitude.

Depth & Spacing Plant seedlings at the same depth they grew indoors and give each plant eighteen to twenty-four inches of space. Crowding habaneros is like packing bulls into a broom closet. They need breathing room to branch out and develop those bright orange fireballs of glory.

Soil & Fertilization Habaneros thrive in well drained soil with steady nutrition. Mix in compost before planting for a boost. Avoid heavy nitrogen fertilizer, or you will grow a small forest with no peppers to show for it. Balanced feeding keeps them hot, keeps stay productive and spicy enough to make you question your life decisions.

Watering Needs Water deeply but let the soil dry slightly between drinks. Overwatering peppers makes them sulk and can wash out flavor. Underwatering makes them hotter than a July rodeo. Keep moisture steady, treat them kindly, and they will reward you with peppers powerful enough to make grown men reconsider their bravado.

Sunlight Requirements Full sun is non-negotiable for habaneros. Give them six to eight hours of sunshine and they will produce peppers that look like glowing lanterns. The more sun they get, the hotter they become. Shade them and you will end up with peppers as mild as a church picnic.

Harvesting Harvest peppers when they turn bright orange and feel firm. Use snips instead of pulling or you might yank the whole plant like a rookie gardener. Wear gloves unless you want to spend the next two hours regretting your choices and questioning reality. These peppers pack heat that sneaks up and stays awhile.

Captain Greenhouse Tip If you want habaneros that will light up your taste buds like the Fourth of July, stress the plant just a bit by letting the soil dry slightly before watering again. It encourages hotter peppers without harming the plant. And grow more than one plant. Folks come out of the woodwork when they hear you have homegrown habaneros, usually wanting to prove how tough they are. Keep a camera ready for the reactions.

Indian Corn

Planting Time Plant Indian corn once the soil has warmed to at least sixty degrees. This colorful heirloom loves heat, sunshine, and elbow room. Planting too early will leave the seeds shivering in the dirt like a rookie cowboy at his first rodeo. Warm soil gives these kernels the confidence to sprout tall and proud.

Depth & Spacing Sow seeds one inch deep and one half inches deep and space plants ten to twelve inches apart. Rows should be spaced thirty to thirty six inches. Indian corn grows tall and wide, so give it room or it will start leaning like a corn hit by a spring storm. Proper spacing keeps airflow strong and prevents tangled stalks.

Soil & Fertilization Indian corn thrives in fertile, well drained soil with plenty of organic matter. This crop is a heavy feeder, so a good compost boost or balanced fertilizer goes a long way. Avoid avoiding nitrogen or you will grow stalks tall enough to scrape the sky with no ears to show for it. Balanced nutrition builds big, colorful kernels.

Watering Needs Keep soil consistently moist during early growth and as ears develop. Dry spells stunt the ears and shrink kernels. Water deeply once or twice a week depending on heat. Think steady, dependable moisture-the kind of routine an old cowboy appreciates. Mulching helps maintain moisture and reduces weeds trying to crash the party.

Sunlight Requirements Indian corn needs full sun, at least six to eight hours daily. The more sunlight it gets, the richer the colors and the stronger the stalks. Shade-grown corn becomes leggy and frail, kind of like trying to rope a bull in a broom closet. Sunshine brings out those famous reds, blues, yellows, and purples.

Harvesting Harvest Indian corn when husks dry and kernels become firm and glossy. Leave the ears on the stalk until fully mature for the best color. After picking, hang ears to dry in a warm, airy place. Once dry, they become stunning decorations, grinding cornmeal, or popping corn, if you like your snacks with personality.

Captain Greenhouse Tip For Indian corn that looks like it belongs in a harvest festival centerpiece, plant several short blocks instead of one long row. Corn pollinates best when grown in clusters. Better pollination means fuller ears and richer colors. Grow enough and you will have neighbors knocking on your door wanting to trade pies, pumpkins, and who knows what else for a few ears of your show stopping corn.

Iceberg Lettuce

Iceberg Lettuce

Planting Time Lettuce is as cool as a cucumber, and Iceberg Lettuce is no different. Plant it early in the spring or in the fall. Once the weather gets hotter than a picnic blanket in July, the plant will bolt, turning bitter faster than spoiled milk.

Depth & Spacing Plant seeds one-quarter inch deep. Thin the seedlings to 10 to 12 inches apart. Give the head room to grow big and round. Rows should be 18 inches apart.

Soil & Fertilization Iceberg Lettuce likes rich, loose, well-drained soil with a heap of compost mixed in. Feed them with a nitrogen-rich fertilizer early on to encourage big, green leaves.

Watering Needs Water steadily and consistently. Keep the soil evenly moist like a damp sponge. Water at the base and keep the leaves dry. Inconsistent watering makes the lettuce taste bitter.

Sunlight Requirements Full sun is best in early spring or fall. Give it 6 hours minimum. In warmer climates, afternoon shade is appreciated to keep the plant from bolting.

Harvesting Harvest when the heads are firm and heavy to the touch. Press lightly on the top; if it feels hard, it’s ready. Cut the head off at the base with a sharp knife.

Troubleshooting Watch out for aphids, slugs, and bolting. Keep soil cool with mulch and water consistently to prevent bitterness and premature bolting.

Captain Greenhouse Tip Iceberg Lettuce needs lots of airflow in the greenhouse. Keep the temperatures cool, and if you see it stretching tall, drop the temperature or give it more shade.

Jalapeño Peppers

Planting Time Plant jalapeno peppers after all danger of frost has packed its bags and headed north. These peppers love warm soil, sunny days, and a gardener with a little grit. Start seeds indoors eight to ten weeks early and transplant once overnight temperatures stay above fifty-five degrees. Warmth makes jalapenos happier than a cowboy at a chili cookoff.

Depth & Spacing Transplant seedlings at the same depth they grew indoors and give each plant sixteen to eighteen inches of space. Jalapenos need room to branch out and produce those bold, green beauties. Crowding them slows growth faster than a flat tire on a ranch truck.

Soil & Fertilization Jalapenos thrive in fertile, well drained soil with plenty of organic matter. Avoid heavy nitrogen fertilizers. Too much nitrogen will grow leaves bigger than a barn door but hardly any peppers. Balanced soil builds flavor, heat, and steady production all season long.

Watering Needs Water consistently but let the soil dry slightly between waterings. Overwatering weakens plants and cools down the heat. Underwatering cranks the heat up like a rodeo announcer on payday. Steady moisture is the sweet spot for strong, flavorful jalapenos.

Sunlight Requirements Give jalapenos full sun, at least six to eight hours daily. The more sunlight they bathe in, the more heat and flavor they pack. Shade them and you will end up with peppers that barely qualify as sassy.

Harvesting Harvest jalapenos when they are firm, glossy, and deep green. Red jalapenos are fully mature and hotter than the green ones. Cut peppers off with snips. Pulling by hand can yank the whole plant loose, which will have you talking to it like it owes you money. Wear gloves unless you want to discover new dimensions of pain.

Captain Greenhouse Tip If you really want jalapenos with bragging rights, give the plants just a touch of stress by letting the soil dry a bit before watering again. This boosts heat without hurting production. Plant a few extra, because folks who hear you grow your own jalapenos show up like moths to a porch light, usually wanting to prove they can handle the heat.

Kale

Planting Time Kale is the tough-as-nails cowboy of the leafy greens world. Plant it in early spring or fall when temperatures are cool enough to make you grab a light jacket but not cold enough to freeze the dog’s water bowl. Kale laughs at frost, shrugs at cold snaps, and keeps on growing long after other veggies throw in the towel like a rookie at a rodeo.

Depth & Spacing Plant seeds about one half inch deep and space them twelve to eighteen inches apart. Give kale room to stretch like a ranch hand waking up from a long nap. Too crowded and leaves get small and bitter. With proper spacing, kale grows big, bold, and leafy enough to make a rabbit weep with jealousy.

Soil & Fertilization Kale thrives in rich, well-drained soil with plenty of compost. If your soil looks dark and crumbly like chocolate cake, then you’re halfway there, partner! Kale needs a shot of high-nitrogen fertilizer during the growing season. Avoid compacted soil that clings to your boots like an overly affectionate stray dog.

Watering Needs Water regularly and deeply so the soil stays moist but never flooded. Kale can handle dry spells better than most greens, but its leaves shrivel up like an old boot. Ideally, target one inch of soil moisture. Channel the water to the base to keep leaves dry, because soggy foliage invites disease faster than free pie attracts hungry minstrels.

Sunlight Requirements Kale loves full sun but will also tolerate partial shade, especially in hot climates. Too much blazing heat and kale gets cranky, curling up like a cowboy hiding from chores. Morning sun and light afternoon shade make kale grow lush, crisp, and flavorful.

Harvesting Harvest leaves when they reach the size of your hand or bigger. Pick the outer leaves first, letting the plant continue producing from the center. Kale is a giving plant, like a grandma who insists you leave with leftovers. Keep on picking, and it keeps growing. Frost even sweetens the leaves, making late-season kale taste better than early-season batches.

Troubleshooting Flea beetles, cabbage worms, and flea beetles may treat your kale like an all-you-can-eat buffet. Knock pests off with water, hand-pick caterpillars, and use row covers during peak infestation times. Avoid overhead watering to reduce disease. If leaves yellow, your kale is begging for more nitrogen or better drainage. Fix those, and kale bounces back like a stubborn bull refusing to sit down.

Captain Greenhouse Tip Kale gets sweeter after a frost, so let Mother Nature do the seasoning for you. Treat kale right with steady water and rich soil and it will feed you longer than most garden crops. Harvest often, keep pests in check, and let this leafy champion prove why it’s the heavyweight of the greens world.

Leek

Planting Time Leeks thrive in cool weather and can be planted in early spring or mid to late summer for a fall harvest. They handle cool nights and light and appreciate steady, mild temperatures. Starting seeds indoors eight to ten weeks early gives them time to size up before moving outdoors. Once planted, they grow slow and steady like a dependable ranch hand.

Depth & Spacing Transplant seedlings deeply, burying part of the stem to encourage long, white shanks. Space plants six inches apart in rows twelve to eighteen inches. Leeks grow upright and polite, never sprawling or causing trouble. Hilling soil around stems as they grow produces tender, blanched stalks prized in soups and stews.

Soil & Fertilization Leeks prefer rich, well drained soil with plenty of organic matter. They are heavy feeders and benefit from compost or balanced fertilizer. Avoid letting soil compact, as tight soil restricts growth. Loose, fertile soil builds thick, flavorful stalks that make you feel like a gourmet chef, even if you are cooking in cowboy boots.

Watering Needs Keep soil consistently moist to encourage steady growth. Dry spells stunt leeks and toughen their outer layer. Think of watering like topping off a stock tank-regular, reliable, and never too much at once. Mulch helps maintain moisture and reduces weeds.

Sunlight Requirements Leeks grow best in full sun but tolerate light shade, especially during hot afternoons. Too much shade slows growth and results in thin stalks. Sunshine gives leeks the energy to bulk up and develop their mild, sweet flavor.

Harvesting Harvest leeks when stalks reach at least one inch thick, though smaller ones are tender and tasty too. Use a garden fork to loosen soil before pulling, as leeks can grip the ground like a stubborn mule. Trim roots and tops for storage. Fresh leeks keep well in the fridge for weeks.

Captain Greenhouse Tip For longer, whiter shanks, hill soil or mulch around the stems several times during the season. Leeks love cool weather, so consider a fall crop for the sweetest flavor. And remember-slow and steady wins the race. With patience, leeks reward you with flavor worth bragging about.

Recent Posts